This post is about the two little greeting card/prints I have created for visitors to ‘have a go’ with during my upcoming ‘residency’ at the Whitehouse Gallery in Kirkcudbright this Easter .
I apologise for its complexity of explanation in places. I’ve tried to simplify but I know some people will be interested. And never did know when to stop!
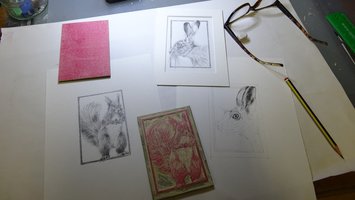
As always – even these little things needed some preparatory drawing. I believe it is the essential basis of much printmaking – especially linocut, to allow ones brain to explore the image in detail first; before beginning to carve. Of course some lino printers work every part of the block out first and then simply remove the non-image areas. Of course, with things like text, I do this too, But most often, I like to ‘draw’ the image with the gouges. And I find to do that I need the almost subconscious preparation of having already translated the source material into graphic form – albeit initially in tones. For one of these prints I had a hare drawing already prepared, but decided she was a bit serious looking, so I drew another.
I apologise for its complexity of explanation in places. I’ve tried to simplify but I know some people will be interested. And never did know when to stop!
As always – even these little things needed some preparatory drawing. I believe it is the essential basis of much printmaking – especially linocut, to allow ones brain to explore the image in detail first; before beginning to carve. Of course some lino printers work every part of the block out first and then simply remove the non-image areas. Of course, with things like text, I do this too, But most often, I like to ‘draw’ the image with the gouges. And I find to do that I need the almost subconscious preparation of having already translated the source material into graphic form – albeit initially in tones. For one of these prints I had a hare drawing already prepared, but decided she was a bit serious looking, so I drew another.
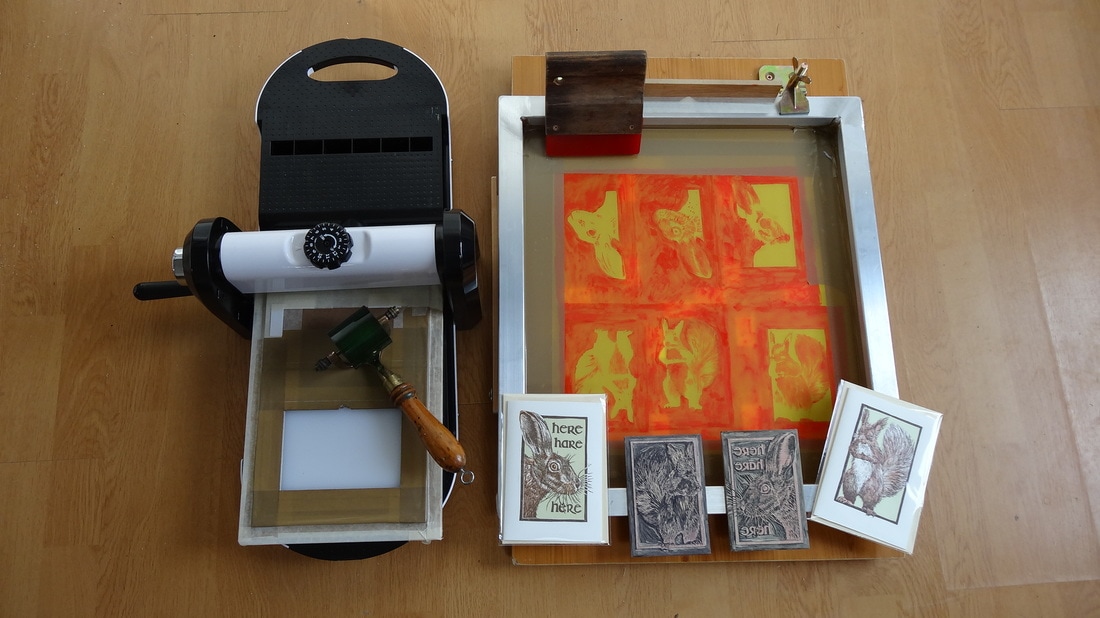
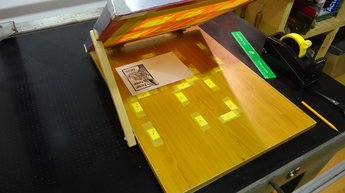
This exercise was partly personal experimentation and partly preparation for showing the use of the XCut Xpress during my gallery residency. Also the intention was to combine screenprint with linocut. (see below) so I used the white plastic base board supplied. And, because I needed a registration method that was transferable to screen printing, I didn’t use the Ternes Burton pin registration system, but reverted to my more usual method of three thin card ‘stops’ to fix the position of the ‘lay edge’.
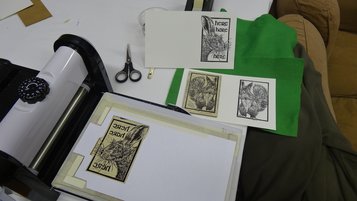
The two wee blocks were carved and proofed in register and just in black.
It is my habit now to print on the XCut in one direction only - from left to right, handle turning clockwise. And I tend to register to the farthest edge of the paper; believing the card stops to help keep the paper in position. Of course, with the Ternes Burton pin system the other edge is used, as the tabs help stop paper drag as it goes through the rollers.
I later flipped the block around 180 degrees, to how it is shown in this pic, so it was still printing in the correct place to make a greeting card, but this allowed the block to pass under the rollers first – thus reducing the risk of paper movement and mis-register.
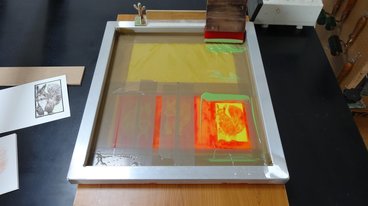
In over 40 years of screenprinting I have never seriously tried to print on paper without the use of a vacuum suction print table. All that is about to change!
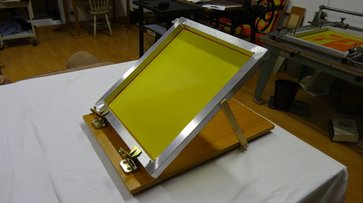
First I bought a pair of these https://goo.gl/17NOgV on EBay. Less than a tenner including delivery. OK I had to wait for them to come from Hong Kong, but they looked sturdier in the pictures than some others I had seen. And so it proved. They seem remarkably well made and efficient for the price.
The screen is a 140t mesh 30mm aluminium section and the base board is a ‘re-purposed’ bit of old kitchen unit melamine surfaced chipboard, with a prop and support made from offcuts.
The black proofs from the lino blocks were used to trace and hand paint six stencils on the screen (I will have to explain this process in another post – this one’s too long already!) The ‘lay edge’ i.e. the corner of the sheets of paper which will go into the registration stops on the XCut is made with thin plastic stops taped firmly to the base board for each of the six stencils (three colours per print).
This part of the experiment was crucial. Modern water based screen inks are not only non toxic; they are thixotropic i.e. they pass fluidly through the screen mesh under pressure from the squeegee, but do not flow much when in the screen. Thus, not only are they less messy (and less smelly!) than the oil based inks I used for many years, but they are less ‘gluey’. I hoped that if printed thinly (hence the very fine 140 mesh) and in relatively small areas, they would not stick the paper to the underside of the screen; thus enabling heavyish paper to be printed cleanly without a vacuum, with no smudging from having to peel the print away from the underside of the screen after each pull.
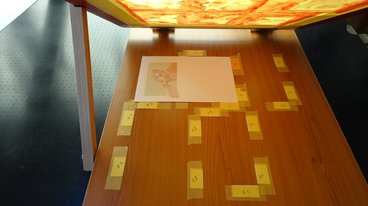
The results were even better than I hoped. Sometimes I had to just wait half a second for the paper to drop back to the bed before lifting the screen and doing the ‘flood’ stroke, but overall a perfect result. It will be interesting to see if larger areas of flat colour will be just as successfully screen printed without a vacuum.
And so a few sheets of 300gsm paper for each image were proofed with three carefully planned colours of transparent screen ink, which also overprinted each other in places to produce extra tones.
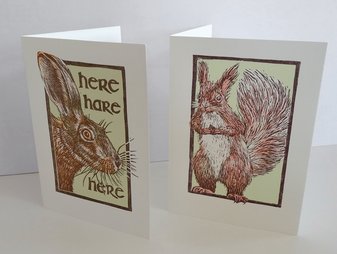
The next and final stage was the most interesting. Would the screen printed tints register with the lino block through the XCut? Would the colours work? Was it all worth it when I already have perfectly good and efficient kit that will do all of this with no problem??!
Two different but more subtle dark browns of Caligo Safewash were mixed for the key blocks and a mask cut to keep the margins clean (note the use of vinyl tape on the ‘forme’ made to fix the block’s position. This makes for easier clean up). The same lay edge goes into the card stops and away it went through the press.
Two different but more subtle dark browns of Caligo Safewash were mixed for the key blocks and a mask cut to keep the margins clean (note the use of vinyl tape on the ‘forme’ made to fix the block’s position. This makes for easier clean up). The same lay edge goes into the card stops and away it went through the press.
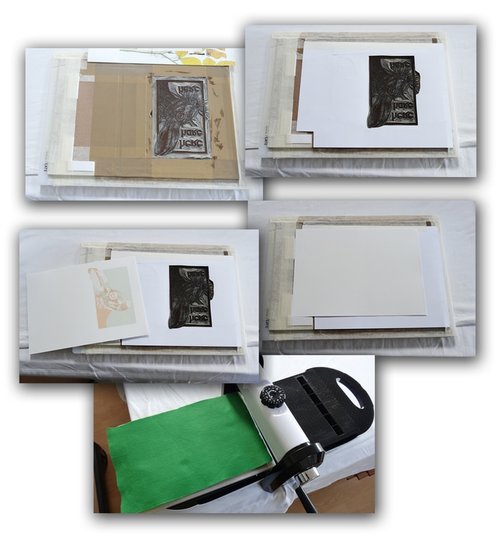
And so…I can just about say that this experiment was a success! The combination of method and dual registration worked just fine - at least at this scale. I will now cut a few hundred bits of paper to size; seal up all the final ink mixes; and prepare for mass public production over Easter!
 RSS Feed