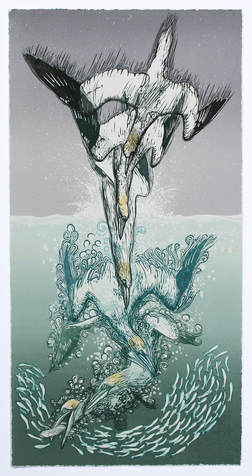
An explanation of the various stages of the making of the linocut and screenprint combination - 'Dive'
Edition of 10, 50 x 27 cm, on 300gsm Somerset.
Edition of 10, 50 x 27 cm, on 300gsm Somerset.
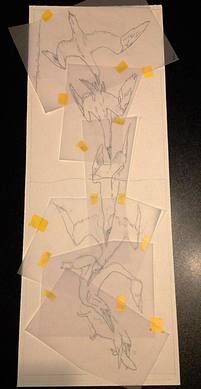
This print of a diving Gannet was originally planned to fit on a full-length half sheet of my favourite 300gsm Somerset paper. However, at the same time I had an option to make the idea suit an application brief for a possible international exchange exhibition with printmakers in Iceland. This meant a maximum paper size of 50 x 40 cms. Would it still work?
As usual I had begun to play with possible composition layouts by using outline sketches on tracing paper. Knowing that the principal objective was to have a sense of movement – diving from the air to vigorous pursuit underwater; and having already decided that the key image for the print would be made by overlapping five or six separate lino blocks, I began work on those straightaway.
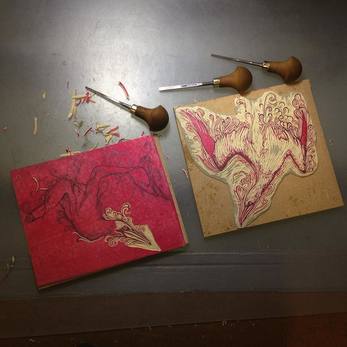
Exactly how to create some additional marks to help impart the sense of different movements and emphasise the flowing composition I wanted was, of course, all part the pleasure and the passion I feel when printmaking.
I continued carving individual pieces of my usual (sanded and stained) Marmoleum lino; which is spray glued to 6mm MDF board. Once the main image of each one was finished, I removed the background areas from the block completely; to help keep these areas clean of ink and free from non-printing embossed carving marks.
At this stage, I realised that I could in fact make all six overlapping images fit and work successfully on the shorter paper size of the exhibition brief. I thought I would keep this first version simple with no second reduction on the blocks as I originally planned; thinking I would still like to do the full-length version at some point.
So, a final ‘map’ of the positions of all the images was made on one of the sheets of paper of the right size and a ‘chase’ to attach the Ternes Burton pins to made up on the bed of my old roller press. All 15 sheets of paper, plus another half a dozen proof sheets, were tabbed for registration.
So, a final ‘map’ of the positions of all the images was made on one of the sheets of paper of the right size and a ‘chase’ to attach the Ternes Burton pins to made up on the bed of my old roller press. All 15 sheets of paper, plus another half a dozen proof sheets, were tabbed for registration.
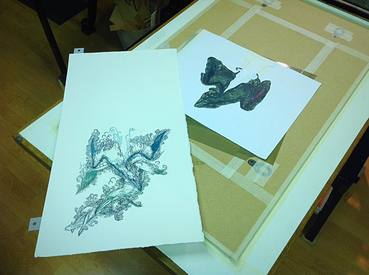
This was important because although no second colours were going to be printed with lino, it was my intention to make this a combination lino and screenprint, so these same registration tabs would be used to register the overprinted screen colours later.
A separate ‘forme’ within the ‘chase’ (grand terms for bits of MDF masking taped down!) then had to be made for each block in turn; to hold the block in exact position for every sheet. And my usual flip over mask made and attached to the forme to keep the background areas clean.
A separate ‘forme’ within the ‘chase’ (grand terms for bits of MDF masking taped down!) then had to be made for each block in turn; to hold the block in exact position for every sheet. And my usual flip over mask made and attached to the forme to keep the background areas clean.
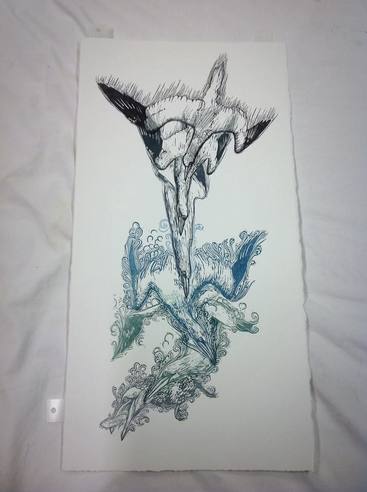
Each sheet of paper in the pack was in fact printed twelve times rather than six. I printed each block once with a very reduced colour (around 90%+ extender). An additional shaped piece of masking paper was then added where the next image would overlap; and the same block printed a second time in a stronger – although still transparent – colour. A lot of extra work in a way, but crucial to prevent the images being too confused with each other when overlapped. The colours also changed slightly from the top one (in clear air) to the bottom one (deep in the water).
I also printed pretty much ‘wet on wet’ i.e. I did not wait for each layer to dry. Caligo Safewash ink – particularly extended like this and printed thinly on to Somerset paper does not ‘set off’ on to the next print. I often do this, but I will sometimes dust very lightly with ordinary cornflour to allow me to handle and stack the prints.
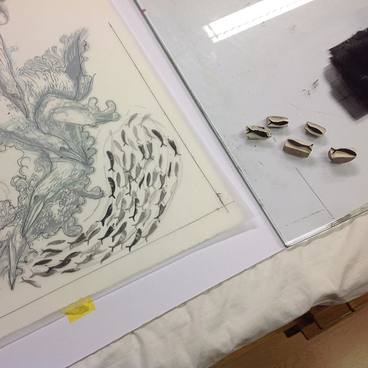
Once all the birds were complete, I had to think about the shoal of fish. To assist my composition of this I made some small stamps by carving the end of bits of old pencil erasers in a few different fishy shapes; then dabbed them in ink and played around with tracing paper overlays till I got it something like I needed.
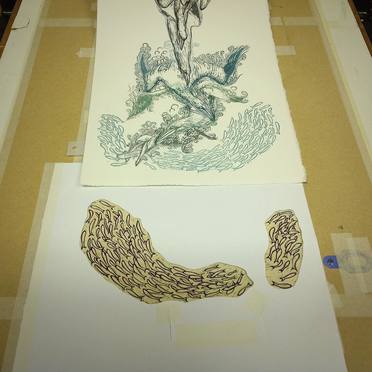
I then traced and carbon papered the shoal down on to a seventh block. Originally, I thought I might gild these fish with silver leaf. But in the end, they worked perfectly well without.
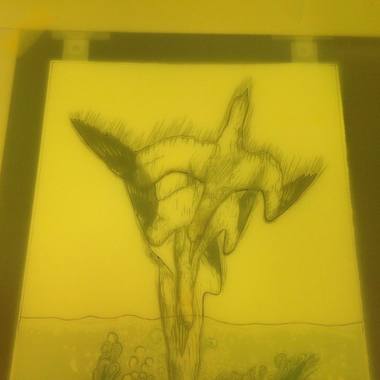
All that remained then was to make and over print the screen printing stencils. As usual I prefer to make these by simply tracing with pencil and using hand painting techniques directly on to the screen mesh using screen filler.
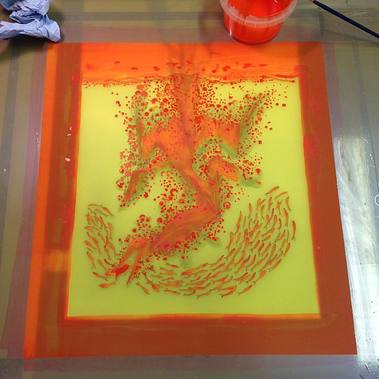
First, a simple two stage reduction for the beautiful golden blush of colour these otherwise black and white birds have on their head and neck.
Then a two-stage reduction of semi-transparent blended cold sea green; once, covering most of the bird underwater, plus a few bubbly marks.
Then a second layer through the same stencil after stopping out all the bird and fish and more bubbles.
Finally the cold grey Scottish west coast sky, with again a hand painted ‘splash on entry’.
I had decided that I would tear down the finished prints to give an edge to edge colour finish (or bleed) but with a softer edge. This is done by damping the tear line on the back of each print and then bravely tearing to a heavy steel straight edge. Although I haven’t done this for years, I was pleased with the effect, despite it meaning that the prints had to be signed on the inked surface and they will have to be ‘float’ mounted for framing.
I have entered it for the possible Iceland exhibition. We'll see!
I have entered it for the possible Iceland exhibition. We'll see!
 RSS Feed