This is the bulk of the blog post commissioned by Jacksons Art Supplies in London - hence the links to their website.
Through an understandable reservation about spending too much on something new, or perhaps attending a group workshop, most people begin lino cutting with cheap, often poor quality tools. And one of the most common things I hear is “I love lino printing and I’d like some better tools, but they are so expensive! – and I don’t know which ones to get”
But to put it in perspective; in terms of value for money, even the very best gouges cost less than a cheap meal and a drink, but they will, with care, outlive you! Sell a few of your (much improved) prints and you’ll quickly pay for a small set of four or five beautiful tools that will soon begin to feel like old friends and will repay your investment over and over again. Not to mention the pleasure of using a tool that actually works for you!
So what do we lino carvers need from our tools?In most situations, all we need to do is leave a nice raised flat surface that will take the ink and print it cleanly on to our paper (or fabric). This means that, especially in the detail of most images and if correctly inked, the shallowest of cuts is all you need. Fine ‘positive’ printing lines and other ‘isolated’ marks will need to be carved so they do not crumble and break off. Some areas will need to be removed altogether and slightly larger gouges will speed up that work. And with experience, a small range of tools will make a wide variety of marks, simply by varying the angle and depth of cut. With practice – lino gouges will make images that have qualities unobtainable with any other media.
Most important of all, your tools must be sharp and kept sharp. A quality gouge will not only take a good edge, but with practice, can be quickly ‘stropped’ to retain it. Such tools can also be sent away and professionally re sharpened if required.
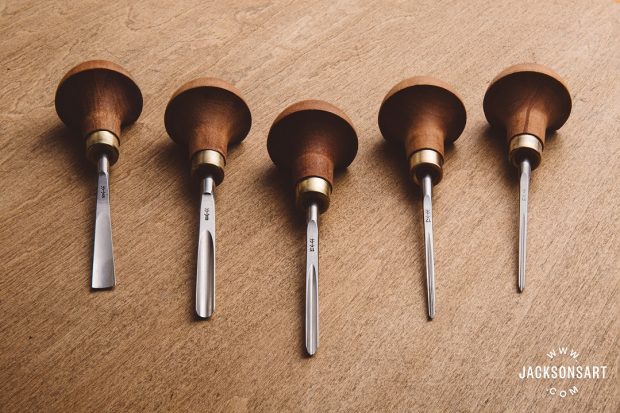
So what are the very best gouges? And which ones should you give up your meal and drink for? Well, of course, like everything in printmaking, everyone quite rightly has their own preferences. Also, in time, you will accumulate all sorts of extra little tools and personal methods of working. I have all sorts of gouges in my collection, but the only ones I use when working seriously on a nice newly prepped bit of real lino block are my favourite set of five Pfeil gouges (plus the occasional use of a standard small craft knife or scalpel).
Pfeil (German for Arrow) are a Swiss company who make a huge range of woodcarving tools. Each tool is made from easily re sharpened chrome vanadium steel, and the mushroom shaped palm-handles (for me – by far the most comfortable and manoeuvrable type) are made of hardwood. From their vast range of tools, their smaller ones have proved ideal for carving lino; but their number coding system requires a training in code breaking! Thankfully Jackson’s have selected those most popular with printmakers. However, when considering which ones to buy, do look very carefully at the various boxed set selections, which sometimes contain tools the printmaker may not actually need. I recommend buying individual tools and building your own set.
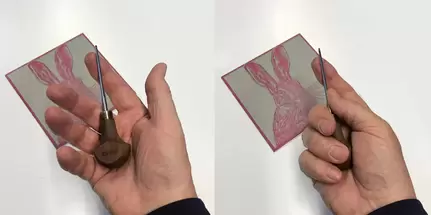
The mushroom shaped palm-handles are for me, the most comfortable and manoeuvrable type.
What follows is my own preferred set of Pfeil gouges. I stress again, we all have our own way of working – but these certainly work for me!
The fine V 12/1cuts an accurate visible line using one side or the other of the V. It also cuts a sloping ‘shoulder’ to the lino which helps prevent crumbling.
1. Small V – 12/1
First is the workhorse; the small V – coded 12/1. I use this one more than all the others put together. In fact I have two. One is sharpened at the original angle as supplied. The other I have ground and sharpened to a slightly steeper angle, which enables me to use a personal technique on textures for fur and feather etc.
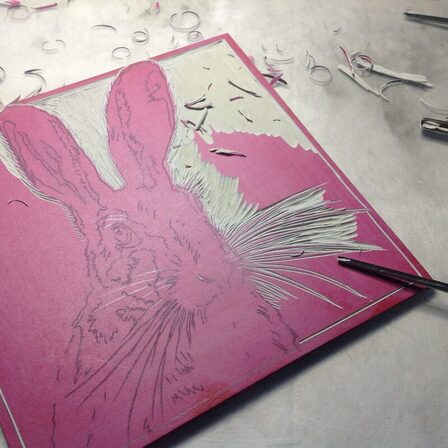
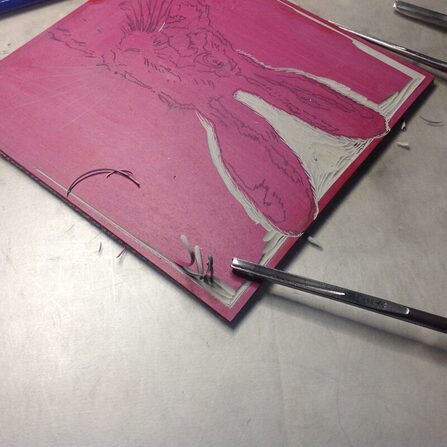
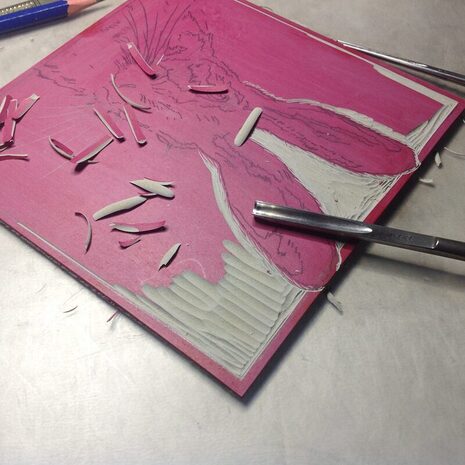
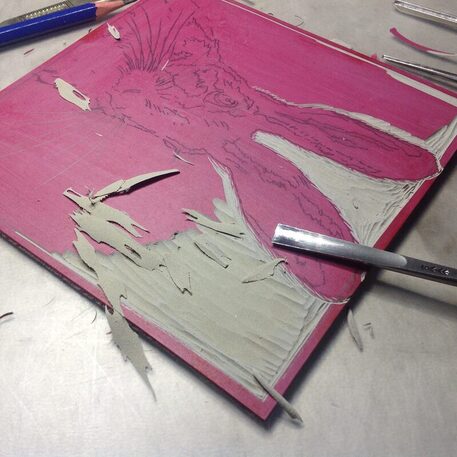
The pictures illustrating this post show the use of ordinary grey ‘artists’ lino rather than my preferred’ slightly firmer’ ‘Marmoleum’ flooring lino. I thought it better to show what most people would be dealing with. I personally cannot stand any of the plastic ‘alternative’ lino products and many of the points I make here about the subtleties of different tools become irrelevant when using plastics – which do not allow the accurate ‘break and flick’ technique of traditional (bio-degradable!) lino.
The 12/1 is not only used to make a wide variety of fine marks, textures and detail, it is used to outline basic forms and areas that will print clear of the background; from large solid flat shapes, to those requiring accuracy – like text. The fine V first cuts an accurate visible line; using one side or the other of the V to accurately follow the guideline. It also cuts a sloping ‘shoulder’ to the lino; which helps prevent crumbling of things like thin fine ‘positive’ lines.
People are often tempted by the slightly bigger V tools available. Don’t be. You are not carving a wood sculpture, so the depth of cut is irrelevant once the surface is removed, and the angle of the V on the bigger ones is pretty much the same as the 12/1 – so there is no real advantage. I have a couple that sit unused in my tool box.
The 11/3 medium U removes plenty of lino to speed the work, but is small enough to follow up the accurate outlining of the 12/1
2. Medium U – 11/3
The next favourite tool I use tends to be the 11/3; a medium U gouge. It removes plenty of lino to speed the work, but is small enough to follow up the accurate outlining of the 12/1: again using one edge or the other of the U. Do beware though. With a sharp 11/3 it is all too easy to get carried away and find you have whizzed through an area that was meant to remain!
The 9/5 – for really shifting larger areas of non-printing lino. As with any U gouge it can also be used to create textural marks by just skimming the surface.
3.Large U – 9/5
My next invaluable tool is probably the 9/5 – a large U gouge used for really shifting larger areas of non-printing lino once the accurate work has been done. As with any U gouge it can also be used to create textural marks by just skimming the surface of the lino and subsequently controlling the printing of those marks through a balance of inking, packing and pressure.
So now, if we include the odd job that requires a flat craft knife or scalpel, that set of just three Pfeil tools: the 12/1, the 11/3 and the 9/5, would be sufficient for most images. However, I would recommend giving up a couple more meals and drinks and getting just two more:
The 5/8 flat U is a useful tool for cleaning up all those non printing areas that run the risk of catching ink and printing background ‘chatter’.
4. Small U – 11/1
The 11/1 – a small U I find invaluable for those small ‘interior’ curves; where I spin the block slightly at the same time as pushing the tool itself. It gives a nice clean detail curve without the risk of a broken, crumbled edge you can get when using a V tool on a tight bend. Again, it also opens up a few more textural options of circular dots and various ‘flick’ marks.
And lastly...
5. ‘Flat’ U -5/8
Finally a 5/8 flat U is a useful tool for cleaning up all those non printing areas that run the risk of catching ink and printing the irritating background ‘chatter’. These gouge marks can be used to good effect in certain prints, but generally I like to both cleanly flatten the area with the 5/8 and also use a paper mask.
So there we are. A simple set of five Pfeil gouges; currently available for just over £90. Not all that much when with care they will last for many years. And once you begin to realise that your gouges are as much a drawing implement as a pen or pencil; and you find yourself reaching instinctively for the right one for which ever part of your image you are working , you will know that any limitations are yours – not theirs!
 RSS Feed