I can't believe that its been a year (and a very strange one too!) since I last wrote something on here.
It’s also been all of four years now since I discovered that ‘craft’ presses could be used successfully for printmaking. A Facebook group I set up – ‘Craft Press Printmakers’ now has over 4000 active members and people all over the world are making terrific work using these small presses.
The original press I used – The XCut Xpress - is now in short supply and seems likely to disappear. It was very portable and had the very useful pressure adjustment, but had size and strength limitations.
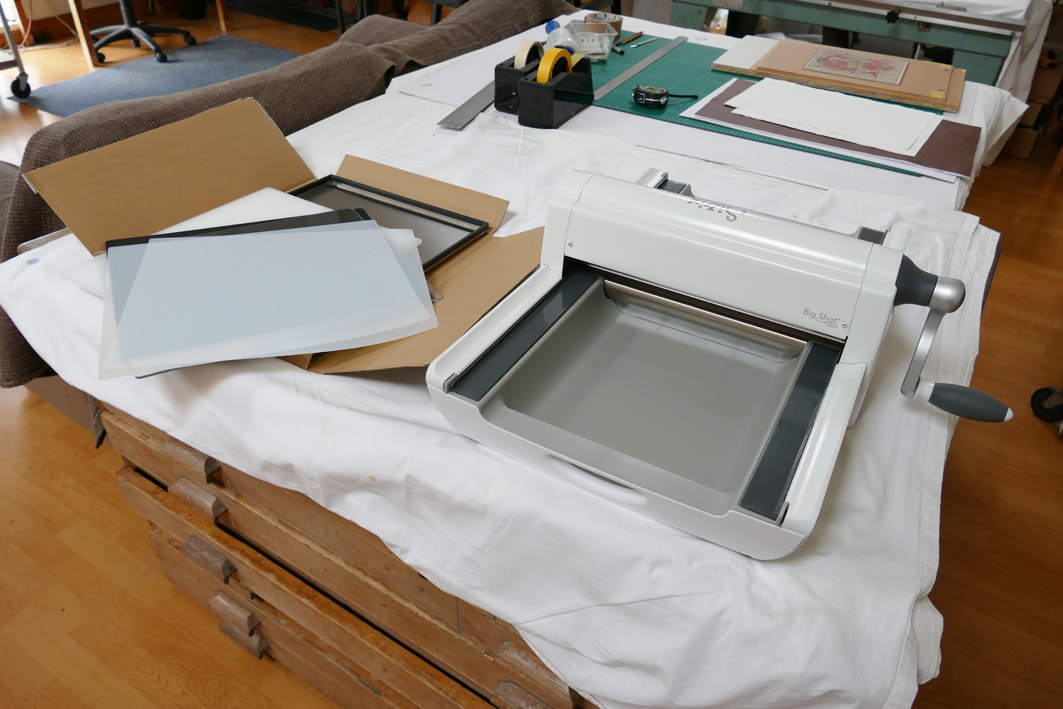
Another major manufacturer of craft presses – Sizzix, currently make the daddy of all craft presses – the Big Shot Pro. When I saw them on offer (worryingly, sometimes a precursor to being discontinued!) I couldn’t resist getting one and having a go. I had no doubt it would print OK – once I had worked out how to build a suitably alterable ‘sandwich’ to control pressure variation requirements. This is the first non adjustable craft press I have tried, but I am assuming the principles would apply to other similar ones.
What follows are just some notes on my first set up. As always I stress that this is what worked for me – and for this particular combination of image, inking and paper. People often ask for a list or recipe for a specific set of sandwich layers for presses with no pressure adjustment. There simply isn’t one that fits all. Indeed, as I continue to work on the demo block I’m using for this set up, I will, no doubt, have to subtly alter the pressure for the different stages.
The Pro is big and heavy; 20 kg/44 lbs and over 60 cm/2ft long. However it can take a bed of 32 cm/12.5” wide (by as long as you want to make one!) It seems to be made with really solid metal parts and the gearing is fast and smooth. It comes with a nicely made selection of shims and pads along with its metal tray; all designed for its principal purpose of die cutting. I didn’t really bother to try any of these as they are too short for my printing plans. However, the black soft pad that is provided would be good for smaller lino/relief blocks if you didn’t want to use a conventional blanket or top ‘pusher’ layer and the metal tray would support set type in a chase.
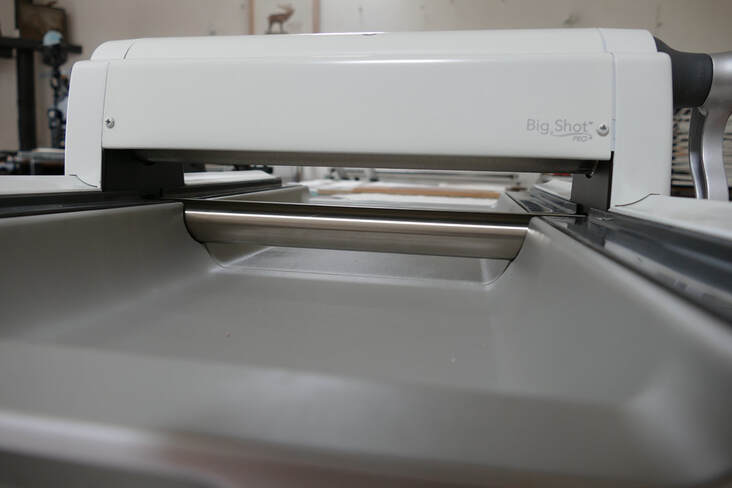
The first thing I did was to measure the roller gap. It is 28mm/1.1” (also room enough to take ‘type high’ material - 23.3mm/.918”) This enabled me to make some rough calculations as to what I would need in terms of my sandwich ‘ingredients’.
It’s also been all of four years now since I discovered that ‘craft’ presses could be used successfully for printmaking. A Facebook group I set up – ‘Craft Press Printmakers’ now has over 4000 active members and people all over the world are making terrific work using these small presses.
The original press I used – The XCut Xpress - is now in short supply and seems likely to disappear. It was very portable and had the very useful pressure adjustment, but had size and strength limitations.
Another major manufacturer of craft presses – Sizzix, currently make the daddy of all craft presses – the Big Shot Pro. When I saw them on offer (worryingly, sometimes a precursor to being discontinued!) I couldn’t resist getting one and having a go. I had no doubt it would print OK – once I had worked out how to build a suitably alterable ‘sandwich’ to control pressure variation requirements. This is the first non adjustable craft press I have tried, but I am assuming the principles would apply to other similar ones.
What follows are just some notes on my first set up. As always I stress that this is what worked for me – and for this particular combination of image, inking and paper. People often ask for a list or recipe for a specific set of sandwich layers for presses with no pressure adjustment. There simply isn’t one that fits all. Indeed, as I continue to work on the demo block I’m using for this set up, I will, no doubt, have to subtly alter the pressure for the different stages.
The Pro is big and heavy; 20 kg/44 lbs and over 60 cm/2ft long. However it can take a bed of 32 cm/12.5” wide (by as long as you want to make one!) It seems to be made with really solid metal parts and the gearing is fast and smooth. It comes with a nicely made selection of shims and pads along with its metal tray; all designed for its principal purpose of die cutting. I didn’t really bother to try any of these as they are too short for my printing plans. However, the black soft pad that is provided would be good for smaller lino/relief blocks if you didn’t want to use a conventional blanket or top ‘pusher’ layer and the metal tray would support set type in a chase.
The first thing I did was to measure the roller gap. It is 28mm/1.1” (also room enough to take ‘type high’ material - 23.3mm/.918”) This enabled me to make some rough calculations as to what I would need in terms of my sandwich ‘ingredients’.
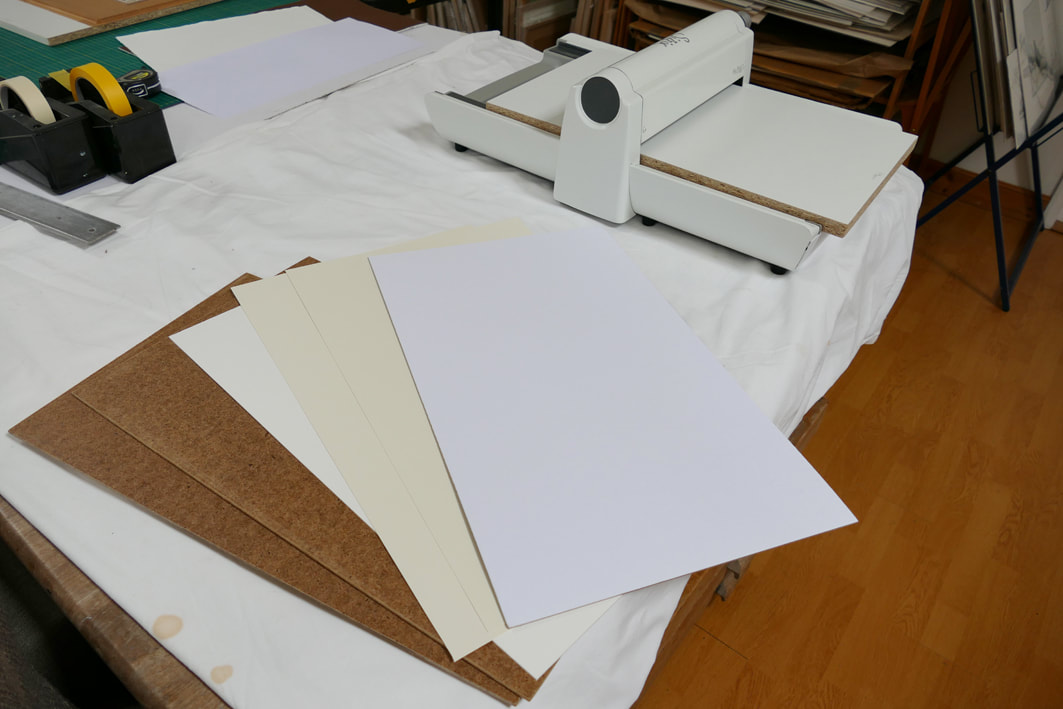
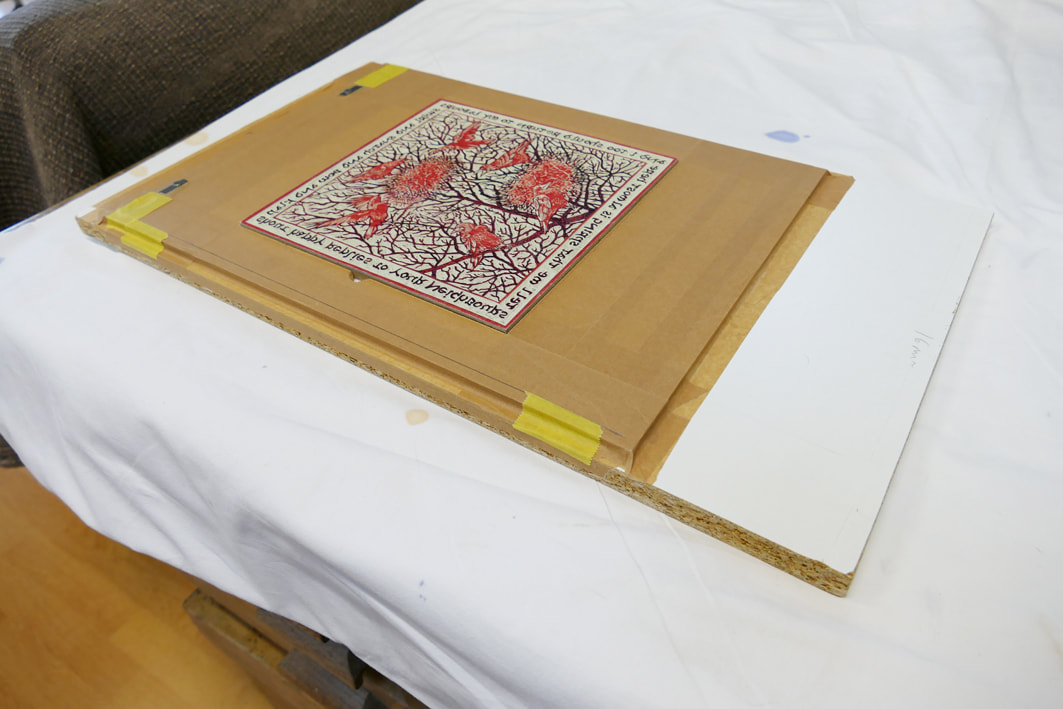
Initially I am setting up for lino printing (I will test intaglio etc later) specifically using my usual Marmoleum glued to 6mm MDF - which comes to about 8mm in thickness. I knew I wanted a good firm bed – of a length to enable normal proportioned prints plus room to lock the block in place and register paper. I have a collection of boards from old kitchen units etc made of melamine faced chipboard. So I made two beds – one 16mm and one 19mm thick.
I also cut some 3mm hardboard/Masonite sheets to size; plus some 1.5mm mountboard and 2mm backing board from my framing materials. Two 3 – 4 mm felts (cheap off eBay) and a piece of (even cheaper) table top protector made up a suitable collection to give me any permutation of basic thicknesses - up to the 28mm; plus some sheets of paper under the block itself as final fine adjustments or ‘make ready’, if required according to the image and inking requirements.
I also cut some 3mm hardboard/Masonite sheets to size; plus some 1.5mm mountboard and 2mm backing board from my framing materials. Two 3 – 4 mm felts (cheap off eBay) and a piece of (even cheaper) table top protector made up a suitable collection to give me any permutation of basic thicknesses - up to the 28mm; plus some sheets of paper under the block itself as final fine adjustments or ‘make ready’, if required according to the image and inking requirements.
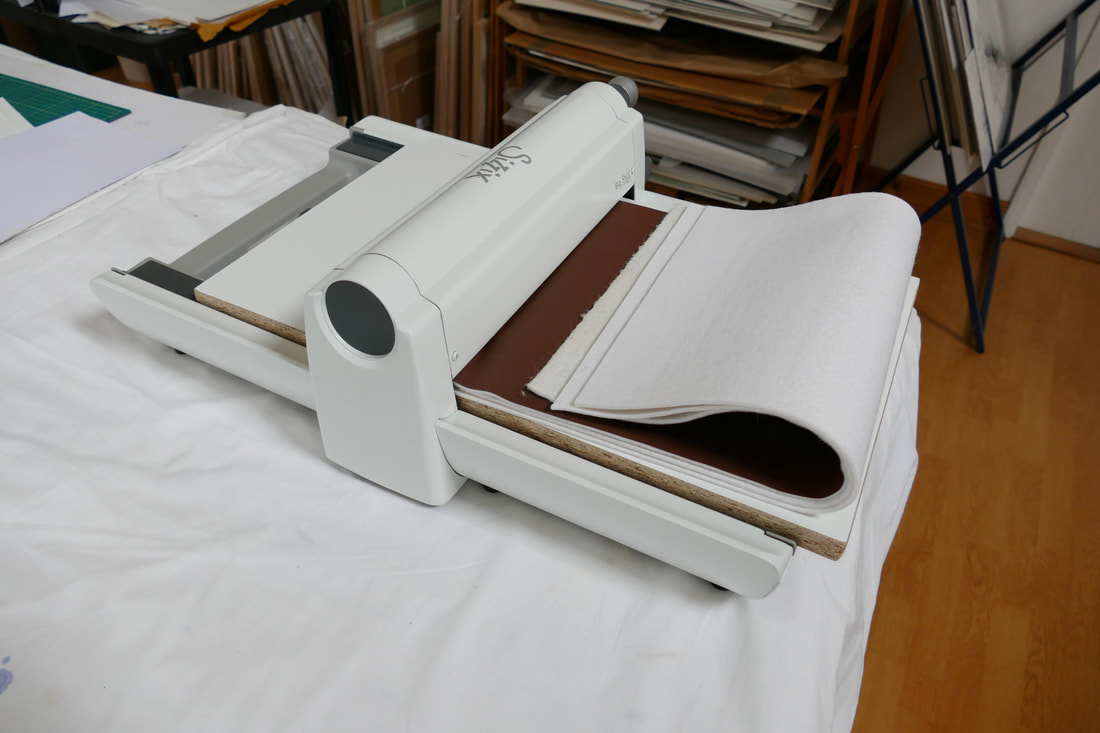
I decided on the 16mm base bed and set up my test block, which is 22cm wide, in my usual tight fitting supporting ‘chase’ of more 6mm MDF plus 0.55 Ternes Burton registration pins. The plan being to make a reduction lino and screenprint combination print as I have done before (see https://www.youtube.com/watch?v=oy-HbhZF4nk&t=999s)
I then added some card sheet packing underneath, and the same size as, the bed to raise it to what I thought would be a suitable remaining gap for the printing paper and soft packing or blanket.
I then added some card sheet packing underneath, and the same size as, the bed to raise it to what I thought would be a suitable remaining gap for the printing paper and soft packing or blanket.
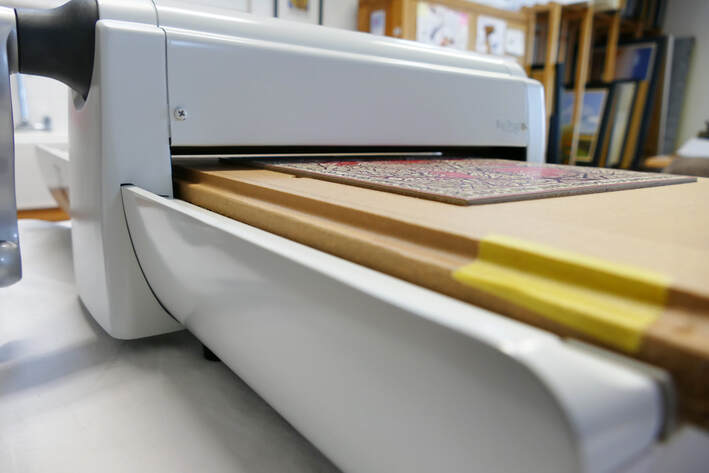
It is important to remember that, by and large, to get the best control of ink transfer – particularly with damp paper and intaglio printing - the firm packing layers of any sandwich should go underneath the block or plate and the top roller should only have to compress the printing paper and a minimum of top packing and/or blanket on top of the block or plate.
I print my lino with thin layers of often quite reduced ink and I find I get a better smoothing out of any surface texture or unevenness of the block if I use at least some soft packing from a top felt or blanket. Such a blanket also helps stop ‘skidding’ of the paper; it protects the roller from even low TB pins; and grips the top roller to give a smooth pass through the press. (The Pro does also have a textured grip surface on the top roller).
With any press set up – particularly with linocut – my method is then to test the block through the press without ink. I am looking (and feeling) for two things: If there is no, or very little resistance to the winding through then it is likely to need some additional pressure. And, of course if it immediately seems like it will take some effort to get it through, I do not force it, but back off immediately and reduce the pressure before possible damage to the block or the press.
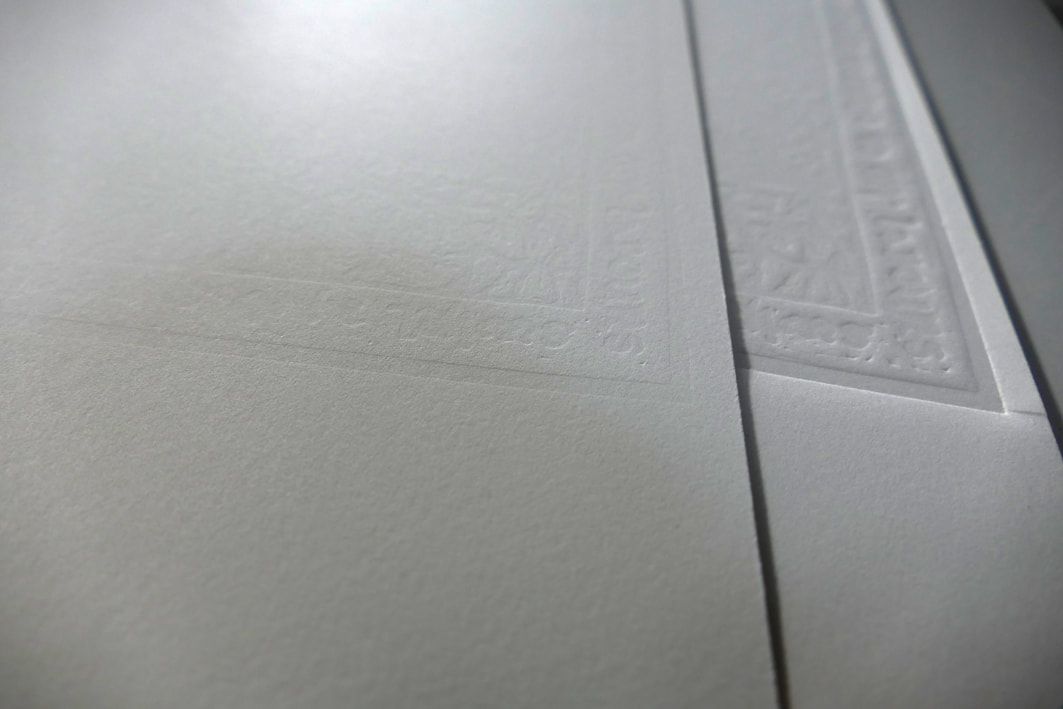
Secondly, with softer papers, like my preferred 300gsm Somerset, I will be looking for just a slight embossing of the edges of the printing areas. When a dry printed sheet of the paper is held to the light and no impression at all can be seen, then ink transfer would likely be weak. And again conversely, an obvious deep emboss will mean smudged ink, loss of fine detail and possible degrading of the block.
Harder papers may not need to show any impression. Then only experience and practice at feeling the pressure on the handle can be used. I keep a supply of suitable off cuts and reject prints of the same paper for all testing. It is pointless setting up a press and print proofing with paper of a different thickness and character to that intended for the ‘good’ prints.
I print my lino with thin layers of often quite reduced ink and I find I get a better smoothing out of any surface texture or unevenness of the block if I use at least some soft packing from a top felt or blanket. Such a blanket also helps stop ‘skidding’ of the paper; it protects the roller from even low TB pins; and grips the top roller to give a smooth pass through the press. (The Pro does also have a textured grip surface on the top roller).
With any press set up – particularly with linocut – my method is then to test the block through the press without ink. I am looking (and feeling) for two things: If there is no, or very little resistance to the winding through then it is likely to need some additional pressure. And, of course if it immediately seems like it will take some effort to get it through, I do not force it, but back off immediately and reduce the pressure before possible damage to the block or the press.
Secondly, with softer papers, like my preferred 300gsm Somerset, I will be looking for just a slight embossing of the edges of the printing areas. When a dry printed sheet of the paper is held to the light and no impression at all can be seen, then ink transfer would likely be weak. And again conversely, an obvious deep emboss will mean smudged ink, loss of fine detail and possible degrading of the block.
Harder papers may not need to show any impression. Then only experience and practice at feeling the pressure on the handle can be used. I keep a supply of suitable off cuts and reject prints of the same paper for all testing. It is pointless setting up a press and print proofing with paper of a different thickness and character to that intended for the ‘good’ prints.
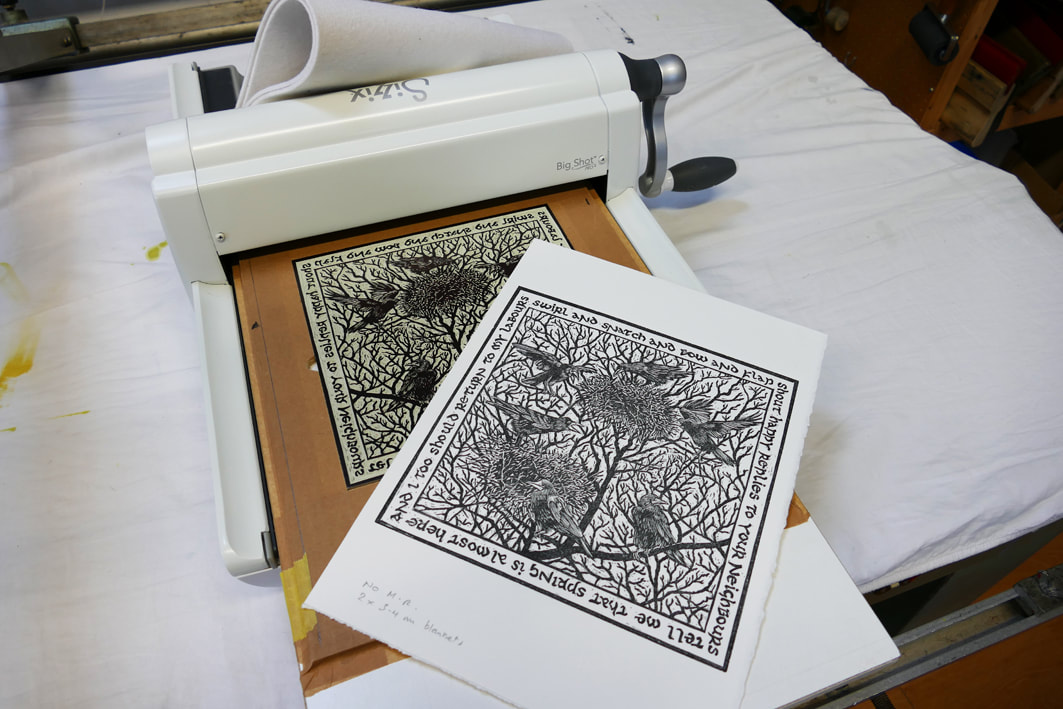
Once happy with my dry run, I can then go ahead and apply ink to the block and take a first proof. Usually this is a little too faint. Which is fine, as it means I can subtly increase the packing or ‘make ready’ under the block and try again (lino prints are a bit like pancakes anyway - the first one is always a bit odd!)
The first black proofs I took were done with two thin felt blankets. I subsequently took out one of these and added a 2mm stiff board under, and the same size as, the bed.
The first black proofs I took were done with two thin felt blankets. I subsequently took out one of these and added a 2mm stiff board under, and the same size as, the bed.
I will follow up with a further report when I have progressed with the edition/s from this block.
Footnote: I am now wondering if, under a good solid bed, instead of full sheets of extra layers; just strips of different thicknesses of something like plastic sheet, on the two side runners only would be easier to use and store, but still do their job?
Footnote: I am now wondering if, under a good solid bed, instead of full sheets of extra layers; just strips of different thicknesses of something like plastic sheet, on the two side runners only would be easier to use and store, but still do their job?
 RSS Feed